Monday, November 15, 2010

Cooking Up Something A Little Different


We made this adorable play kitchen for our two and a half year old son, Adam. Before you "ooooh" and "aaaah" and think we are the most talented people ever, I am here to say we are NOT. We've both seen our shares of mess ups and mistakes, but this kitchen truly was easy to put together thanks to Ana White and her generous (FREE!) plans!

I really wanted a play kitchen for Adam, but I can be a little bit picky. I didn't want some big plastic contraption. I didn't want one of the big hefty kitchens made from pressed particle board that would be sure to fall apart within a few months, but I really did not want to spend more than $600 on a toy.

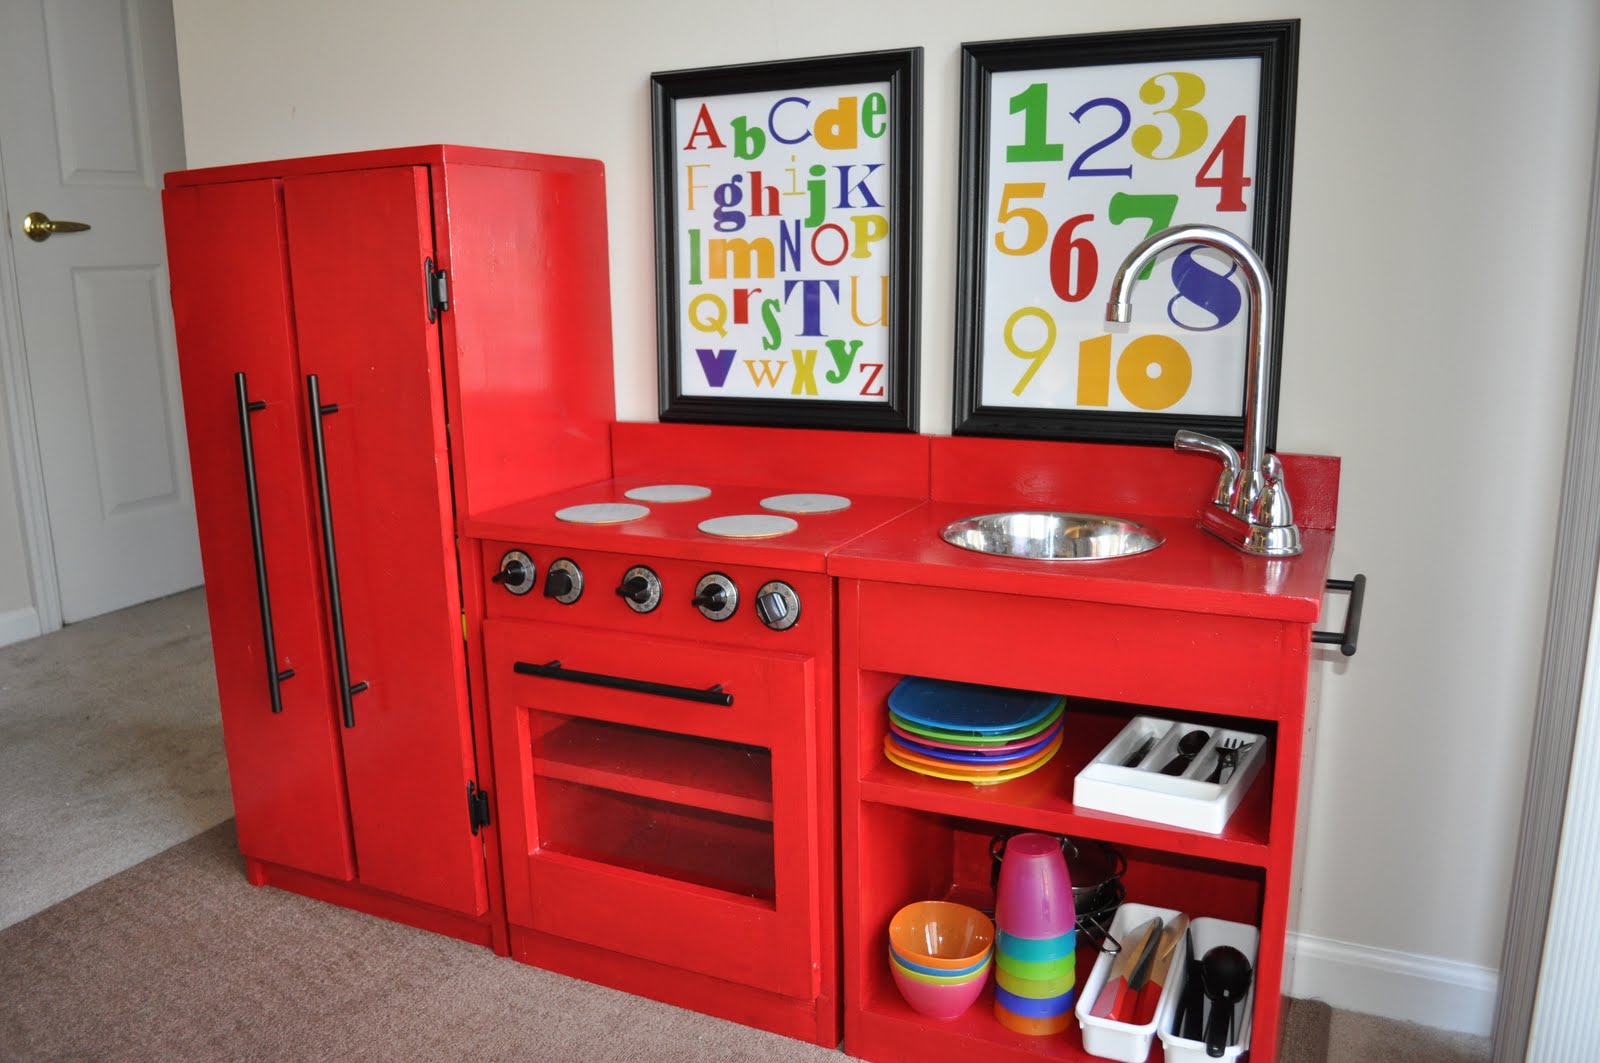
Enter Ana's plans. Thanks to her, we were able to build this fantastic play kitchen for under $150!

Here's how I finished it off:

The handles on the fridge door are simple drawer pulls snagged at Lowe's on clearance for $1.30 and $0.89 each.

The oven and stove knobs came from eBay seller partsmadness. They were just under $13 for the set of five with free shipping.

The stove burners are plain unfinished 4" round circles found in the unfinished wood section of my locals Michael's craft store.

The sink faucet was a great find. Our local Lowe's had a cart filled with damaged faucets. Ours was missing a piece needed for plumbing, but it was perfect for our playkitchen project, and a bargain at just $10!.

The sink is an 8" stainless steel dog water bowl purchased for around $6 at Target.

The dishes are from Ikea, and they have some of the best gender neutral pieces for very affordable prices.

Lastly, the alphabet and number prints came from Etsy seller Craft Therapea. They were custom made to match Adam's room, but I have a sneaking suspicion she'd be thrilled to work with you on your very own set.

I also wanted to say that we live in an apartment with no garage or work space. We had Lowe's make all the lumber cuts (it cost less than $6 and he did an excellent job!) and then assembled and painted this kitchen in our apartment. I'm not lying when I say that ANYONE could do this.

And now it's time to play!

Saturday, October 9, 2010

New fabrics


A little something for a mystery project I'm working on.

Want to take a guess what they might be for?

Here's a hint: there is a clue in my shop!

Thursday, September 30, 2010

A peek inside my new sewing room.

We recently moved, and that meant packing and unpacking all the stuff from my old sewing room. It was a pretty big job. It was also a little challenging because I had the entire finished basement in our old house to claim as my workspace, but I was downsizing. We've moved into a small apartment for a year. It's a temporary home, and thus, a temporary workspace. Without further ado:


My sewing desk. It's the desk from our old office, the Madison trestle desk from Target. I love this desk. it's solid and sturdy and the finish doesn't scratch. It gives me plenty of space to spread out, and I kind of regret not claiming it as my sewing desk much sooner!

The black shelves are from Ikea, and again, they were from our former home office. They now hold all my various sewing notions, thread rack, and some of my thinner ribbons.

I used a simple piece of grosgrain ribbon below the shelves to clip up fabric samples and other various bits and pieces.


These Closetmaid cubicals house all of my finished products. I like being able to see at a glance what I have in stock. The bins below hold projects I am working on.


The best part of the entire space: the walk-in closet! My beloved cutting table didn't make the cut (har har har) when we moved, so I needed an alternative place to store my fabrics. The racks on the wall are Closetmaid pantry racks, and they are the perfect size to hold my spools of ribbon.


And lastly, the shipping center. I repurposed the cabinets from my cutting table, and I use them to hold paper crafting supplies and other various random items. I used a cheap curtain rod to hold the ream of tissue wrap on the wall to keep it neat and wrinkle free. Letter trays organize my mailers and shipping labels quite nicely.

By the way, before you even ask- No, it does not look this tidy all of the time ;)

Question of the day: What is your favorite product for organizing your craft supplies?

Welcome to the new Mada's Place blog!

I'll slowly be transitioning my former blog to a more personal blog. This will be the new place to see what I'm working on, what craft shows I'll be attending, special offers, and general fabric yumminess :) I'll also be sharing some of my favorite Etsy and craft show tips.

I hope you enjoy the new blog!